Showing posts with label Cupcakes. Show all posts

Tuesday, April 12, 2011

Ice Cream Cone Cupcake Pan


The next time you're craving some ice cream, have it with a cupcake ice cream cone! I received my ice cream cone cupcake pan a few years ago, and I love using it. 

The pan comes with directions on how to make the cupcakes, and once they are baked and cooled, it's simple to make it a delicious dessert! You can pipe icing on top similar to soft-serve ice cream and top it with rainbow sprinkles. Or, you can use actual ice cream and just scoop some on top of the cupcake! However you decide to decorate it, it's a fun, easy and adorable way to eat a cupcake! 

The pan makes 6 cupcakes at a time, and one per person is the perfect serving size. Now I can't wait for summer so I can make these! 

Monday, April 4, 2011

American Flag Cupcakes

These are easy to make!

If you ever need to make American Flag cupcakes, this is the way to make them! I got the idea from my Hello, Cupcake! book but I also used some of my own ideas.
In high school, we had a fake Inaugural Ball that was pretty much just a school dance, and I volunteered to make this for the event. They were gone within minutes! and pretty easy to make.

After making 48 cupcakes in white wrappers and letting them cool, and colored my icing red, blue and white. I started with the blue cupcakes, and after icing one I used mini marshmallows and/or white M&Ms to make a design (to replicate the 50 stars). I did this for 12 cupcakes, and varied my design each time.

Then I moved onto the 16 red cupcakes. For these, I used Twizzlers that I cut up, red Mike & Ike's, Swedish Fish, Red Jujube's, red M&M's and red star-shaped sprinkles.

For the 20 white cupcakes, I just iced them with white icing. You can also add white decorating sugar to make them stand out.

When I was done decorating each cupcake, I just had to organize them to look like an American Flag. and then it was done! To make them yourself, you can vary it however you want. Use whatever red and white candies you can find, and color the icing whatever shades of red and blue that you want! Just remember that laying 48 cupcakes out on a flat surface can take up a lot of room, so make sure you find somewhere that you can keep them or carry them when you're done! I used a sheet cake box from Michael's and it working out perfectly. Good luck!

Monday, March 28, 2011

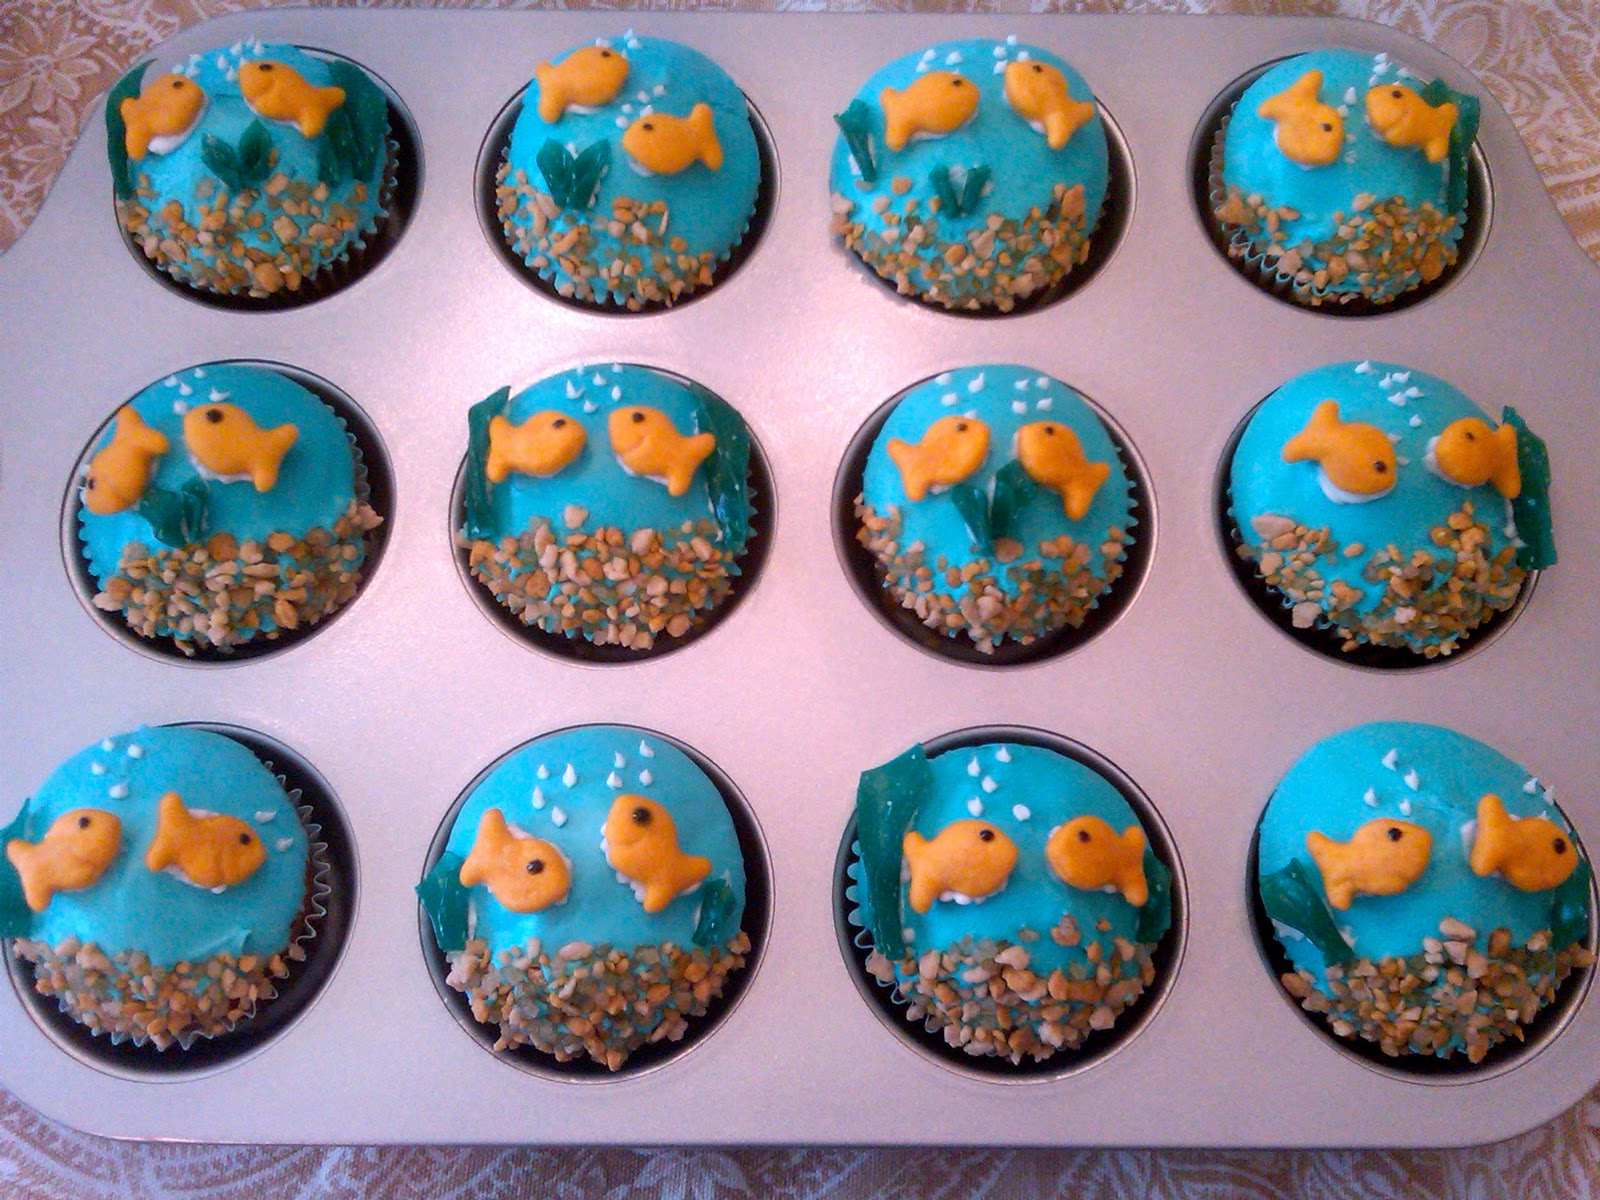
Fishbowl Cupcakes


How cute are these cupcakes!? 
They are one of the most recent things I've baked and decorated, and they were actually pretty easy to make! I got the idea from my Hello, Cupcake book which has some really adorable cupcake ideas (although I've only made a couple so far... I'll post about the other ones I've made later!) 

To make these, I needed to buy green fruit leather (which I found at Target) for the seaweed, Goldfish for the fish and Betty Crocker Praline Crunch Ice Cream Topping for the gravel on the bottom of the bowl (which I also found at Target). Before I made these, I google-imaged them to see what other people had done, and some people used nerds or colorful sprinkles for the gravel which was really cute too! 

To make the cupcakes I used plain white liners and boxed cake mix, and then I used two cans of white icing to ice the 24 cupcakes. After you add blue food coloring to about 3/4 of the icing, you melt it in the microwave via the instructions in the book and then you dip the cupcakes in the melted icing to give it this cool smooth and watery look. Some advice I have is that the book tells you to dip part of the cupcake in melted white icing and make a rim on top (to give it more of a fish-bowl effect), but I thought that didn't seem to be worth it, since they were already really cute! So if you want, feel free to skip that step. And when you're finished icing them and adding all of the decorations you have these adorable cupcakes!! 

I made them for my seven year old cousin's birthday party and everyone loved them!